
Due to how busy modern lifestyles are in the developed world. Many families find themselves taking a trip to their favorite fast food restaurant more often than they’d like to admit. According to information from the Bureau of Labor Statistics, approximately 45% of a family’s food budget goes to eating out. In 1977, that rate was just 38%. That means the average household spends more than $6,000 per year just to eat out.


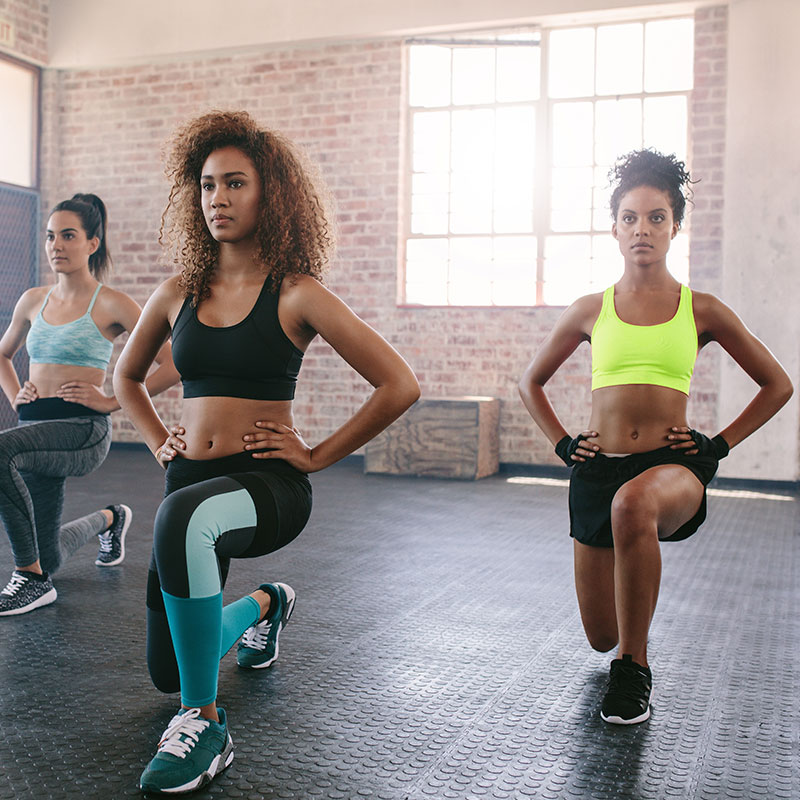
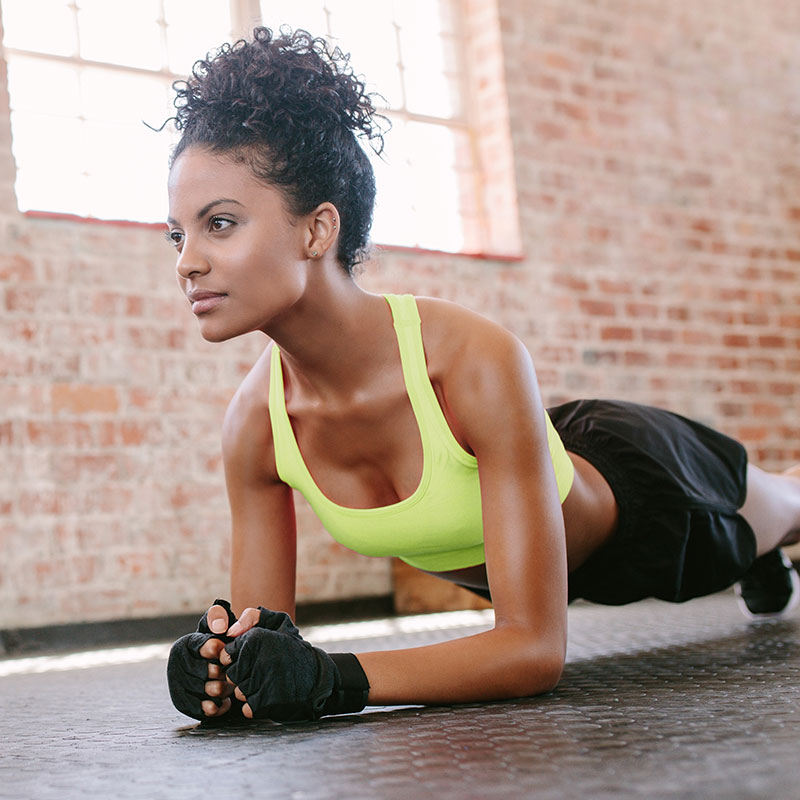
Activity
Activity and rest are two vital aspects of life.
Workouts
Action is the foundational key to all success.
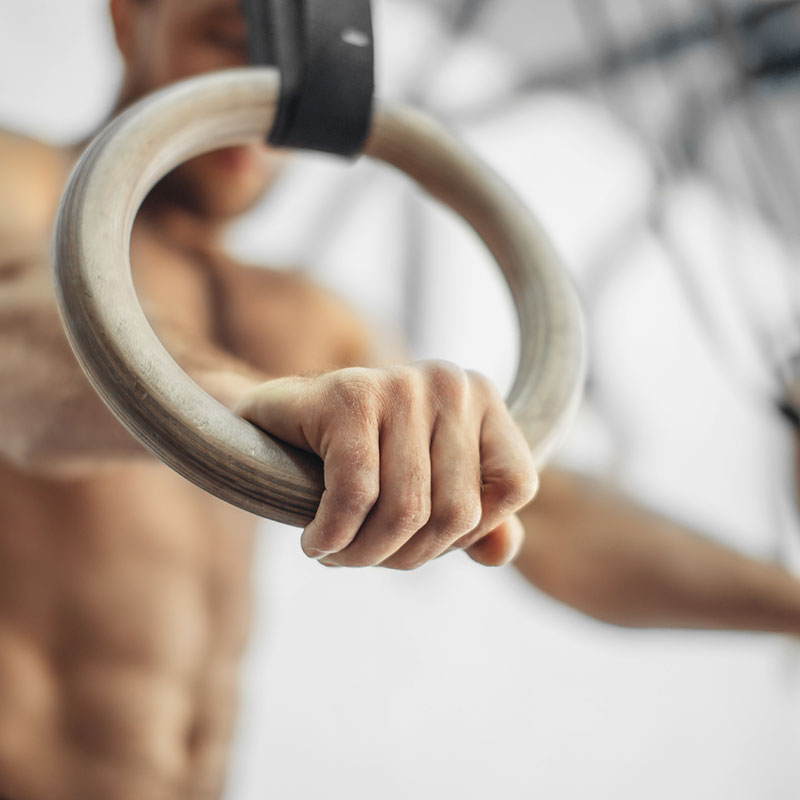
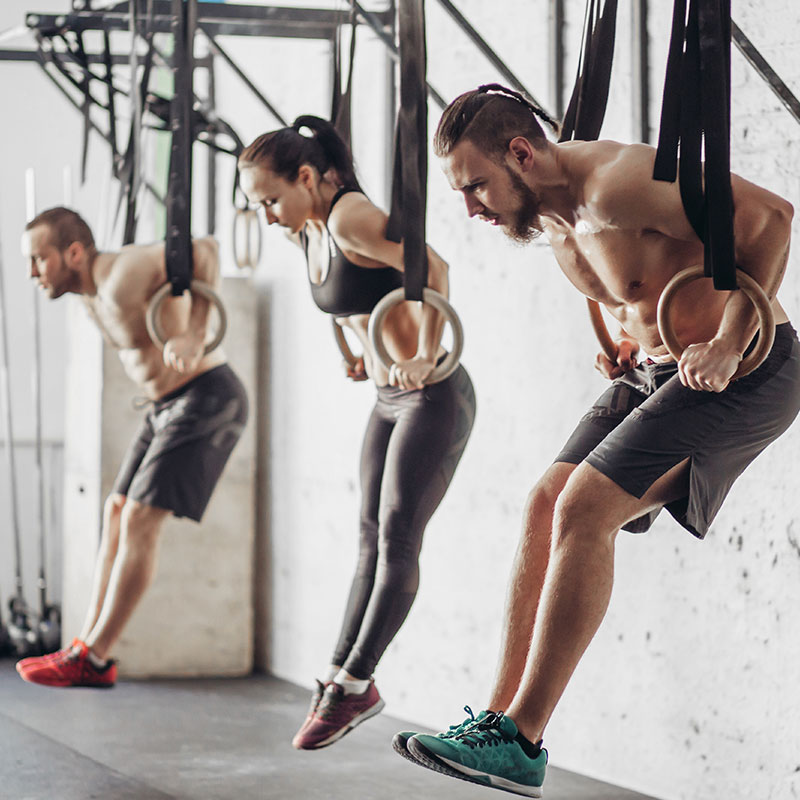
Strength
You can become strong and powerful.
The human body has been designed to resist an infinite number of changes and attacks brought about by its environment. The secret of good health lies in successful adjustment to changing stresses on the body.
Greatest wealth is health.
what they say

Sed ut perspiciatis unde omnis iste natus error sit voluptatem
pericula es aperiri consequat aner iuser lorem tincidunt vix at, vele pe rtinax sensibus id, errore
enim ipsam voluptatem quia voluptas sit aspernatur.Alienum phaedrum torquatos nec eu, vis detraxitssa ericuliser ex, nihil expetendis in mei. Meis an
pericula es aperiri consequat aner iuser lorem tincidunt vix at, vele pe rtinax sensibus id, errore
epicurei mea et. Mea facilisis urbanies tas moderatius.
At vero eos et accusamus et iusto odio dignissimos ducimus qui blanditiis praesentium
pericula es aperiri consequat aner iuser lorem tincidunt vix at, vele pe rtinax sensibus id, errore
am libero tempore, cum soluta nobis est.


Health Knowledge
The human body has been designed to resist an infinite number of changes and attacks brought about by its environment. The secret of good health lies in successful adjustment to changing stresses on the body.
READ OUR ARTICLES
Blog of 5 tips on how to care for the elderly

Would you like to know 5 tips on how to care for the elderly? If you direct your professional career to care for the elderly, you will want to know 5 tips on how to care for the elderly. Throughout this post, we are going to see fundamental notions for the care of our elderly. Sometimes, there are people who cannot take care of their family, specifically the care of the elderly.
10 shortcuts to lose weight in a healthy and fast way

Water, in addition to helping us eliminate toxins, allows us to stay satiated and improves our digestion, which is why it is essential on a day-to-day basis to lose weight.
Complete oil guide: which one to choose and how to use it

We need a complete oil guide. There are many types of oil that we can use in the kitchen. Each type of preparation requires a different one. Can you tell which one is the most suitable?
Today we have many types of vegetable oils and fats that we can use in the kitchen. In any supermarket we find varieties of olive, sunflower, peanut, corn and seed oils, and normal or enriched vegetable margarine, but which one to choose and why?
I explain the essential ones, the less essential ones, and the uses you can give them.
Olive Oil
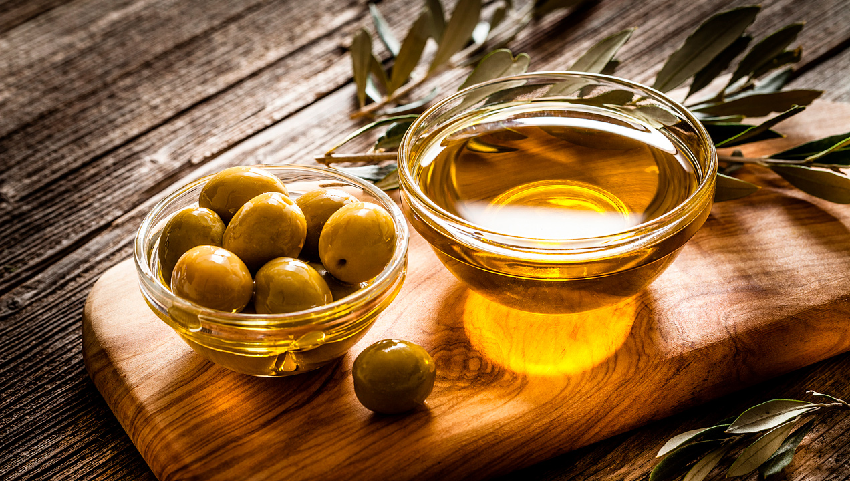
I put it first because it is the basic in my kitchen, the one that should never be missing.
Of all the oils they sell, extra virgin olive oil is the only one that is essential for me. With extra virgin olive oil, you can cook anything and season any food raw.
It works just as well for browning vegetables as it does for toast (yes, I make them with olive oil instead of margarine). It’s expensive, I know, but using it well it lasts a long time, it doesn’t go bad quickly, it withstands high temperatures and it’s the healthiest we can use.
Make It Extra Virgin Olive Oil
Refined oils are usually cheaper, but the price difference is not worth it at all. Do not look only at the price, take a good look:
That it be “extra virgin olive oil”, not “refined oil”, “olive oil” or “refined oils and virgin oils”. Extra virgin olive oils have more nutritional properties than refined ones. They are also usually denser and darker in color (regardless of the color of the bottle).
The degrees that often appear consigned refer to the number of fatty acids present. An extra virgin olive oil will have around 3º. The rest, much less.
It is not that refined olive oil is “bad”, it is that the refining process eliminates “the bad” but also “the good”. What remains is an oil that is not of much interest at a culinary or nutritional level.
Take Into Account Its Origin
If you also want to reduce your carbon footprint, see that your oil is produced as close as possible to where you buy it (and if possible also the cultivation of olives).
Many times it is difficult to find a local olive oil, but you can look at agricultural cooperatives in your province and surroundings, surely there is one that produces good oils.
The Variety Of Olives
In supermarket oils, it is often not specified, but if you can choose, choose the oils made with the varieties that you like the most according to the uses that you are going to give them.
For example, the oil of the Hoja Blanca variety is softer, while picual is stronger and more pungent. There are many more varieties, if you take a look at cooperatives you will see that there are many types of olives that give rise to different oils, each one with its characteristic aroma and flavor.
My favorite oils to drink raw (salads, toast, etc.) are the varieties with stronger flavors (picual, cornicabra, and local varieties).
The State Of The Oil And The Expiration Date
Always check that the bottles are not broken, that there are no foreign bodies inside, etc.
When it is very cold you can see some solidification of the oil at the top or at the bottom, but this is normal (it usually happens at home on the coldest days of winter).
Sunflower Oil
I put it in second place because it is the second most common.
One bottle will last you a long time. As it is not the preferred oil for cooking, you should only use it for very specific things. A bottle of sunflower oil can last for many months, just keep it closed in a cool, dry place away from the sun.
Sunflower oil, in general, is cheaper than olive oil, but it does not have the same properties, far from it. It should not be our “off-road” oil, but it can be used for some things.
To Fry
If we are going to make a few batches of fried croquettes or things like that, we can use normal, high oleic, or “special frying” sunflower oil. It has hardly any flavor and is less viscous than olive oil, which is why batter and breadcrumbs are less oily.
Vegetable Mayonnaise
If you have tried to make a vegetable mayonnaise with olive oil you will understand this recommendation. In general, extra virgin olive oils have a very strong flavor for these sauces. Better use high oleic sunflower oil.
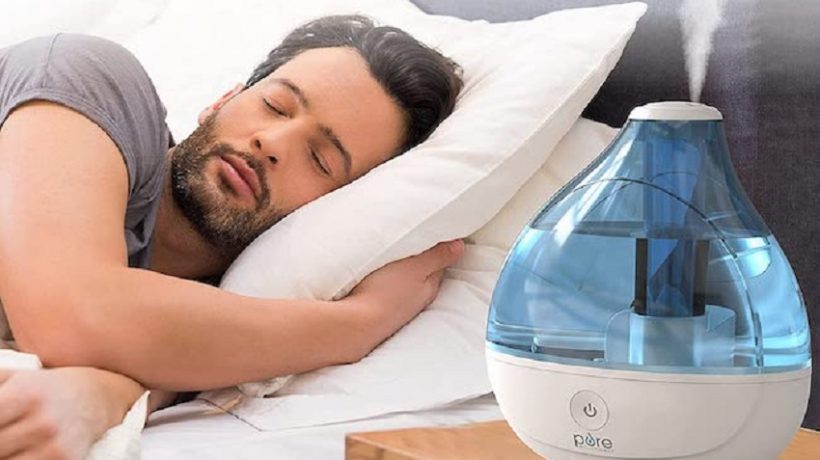
You may also be interested in WHAT KIND OF WATER TO USE IN THE HUMIDIFIER?
What kind of water to use in the humidifier?
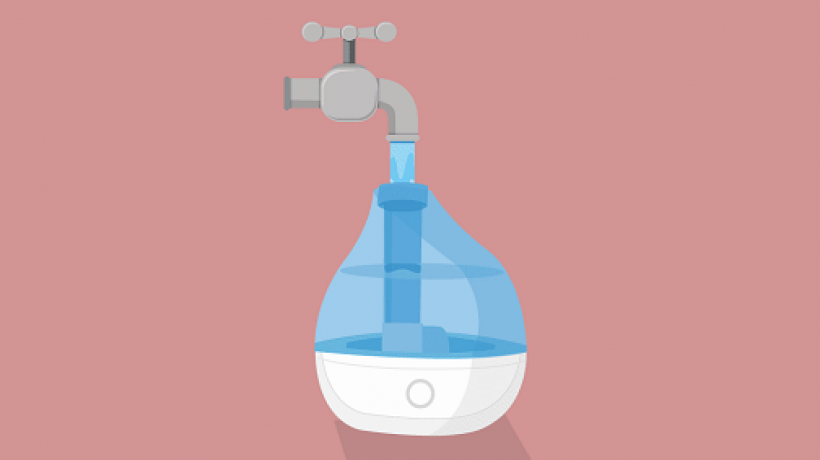
Humidifiers are commonly used in homes to remove dryness from the air. By controlling and improving indoor air quality. The best filterless humidifier helps prevent problems such as skin irritation, respiratory disorders, winter allergies, and many other similar issues. Suppose they are not used properly. They can cause a variety of other health problems instead of solving them. It’s the water we use in our humidifier making a difference.
It is the water used in the humidifier tank. The one that turns into mist and comes into contact with our external skin. The airways and lungs provide relief. The higher the quality of the water. We will obtain better results. For this reason, it is important to take care of the quality of the water that we use in our humidifiers.
What water to use in the humidifier?
The quality of water used in a humidifier plays an important role in providing clean, moist air for breathing. Therefore, it is important that the water you use in your humidifier is always filtered or distilled. Avoid using plain tap water.
Distilled water is often recommended by most humidifier manufacturers and is considered the best water to use in a humidifying device. Your regular water supply may contain minerals.
Bacteria and other harmful viruses can be dangerous to your body when in contact with humidification. All of these items must be thrown out of the hard water before it is used in the humidifier. This can easily be done by distilling or purifying the water at home.
How to make distilled water for a humidifier?
It is clear from the above discussion that the use of hard or saltwater in humidifiers should be strictly avoided. To be safer. You should always use filtered water. Purified or distilled in the unit. As such. There are many ways to make pure distilled water (from regular tap water) for your humidifier. You may also like to read, what is an ultrasonic humidifier?
So instead of worrying about where to buy distilled water for a humidifier. Why not try these methods at home and get pure distilled water for your humidifying machine quickly?
In case you are eager to know how to make distilled water for your humidifier by yourself (DIY plan). Here are some easy tips:
It is a process in which water is boiled above the boiling point, which is converted into the form of steam. Then the same water vapor is condensed and collected in another container to obtain pure water.
During this process. Impurities (if any). They will be left in the first container in which the water has been boiled. Even so. Some impurities could be present in this distilled water which can be removed by the double distillation method.
The water produced as a result of double distillation will be much better for use in humidifiers than that produced by a single distillation process.
Demineralized water
Demineralized water is a special form of purified water from which most minerals and salt ions are removed. In this process, the ionized particles are exchanged to form water. The cation and anion of water exchange with OH (hydroxide) and H (hydrogen), which when fused become water (H2O).
But in this case. The ionized impurities are removed and the bound particles (and also biological impurities) remain in the water. To get rid of her again. This water has to go through a demineralization process and the resulting water will be double deionized water.
Reverse Osmosis System
In this method, the semi-permeable membrane is used to remove larger particles and impurities from the water during the process. It ensures that the solute does not pass through the membrane and that the solvent only passes through it.
The use of a reverse osmosis system at home is one of the most effective processes by which we can obtain pure filtered and distilled water for the humidifier device in the end. The same reason to buy a humidifying machine will be in vain if you use tap water in your unit.
It is always better to use pure distilled water to enjoy the maximum benefits of your humidifier for a long time.
How to make distilled water at home without a distiller
To make some distilled water at home. You just need a pot and some ice. With this method. Boil some water in a pot, then place a glass lid upside down on top of the pot.
Put ice on the lid so that when the boiling water creates steam, it rises and later condenses, when I hit the glass at the top. The water that goes back into the bowl would be distilled water.
Can I use boiled water in the humidifier?
Hot boiled water and distilled water are two different forms and should not be confused with each other. Distilled water does not have any impurities present in it. So it doesn’t leave any dust or salt in a humidifier tank to be cleaned.
On the other hand. Boiling tap water concentrates impurities without removing them. Therefore it is not an ideal option for your humidifier.
Therefore. You may have many minerals and impurities present that can remain (as mineral build-up) in the humidifier machine and should be cleaned after each use.
Can you use bottled water in a humidifier?
At times when there is no distilled water around and you are unsure of the quality of water, you are getting from your supply. It’s good to consider putting bottled water in your humidifier.
Bottled water from most reputable brands is much better compared to tap water. But nevertheless. They are only recommended when you do not have the option of obtaining purified distilled water.
The fact that you should consider here. It is that these bottled water bottles are not 100% free of minerals and inorganic elements.
There are many brands that claim that their bottled water is filled from natural spring and other underground sources – there are still traces of minerals found in said water.
Using that bottled water in a humidifier can cause scale buildup on your device and release minerals into the atmosphere. Although drinking this bottled water does not cause any harm to the body. It is NOT the best type of water for your humidifier.
How much water should I put in a humidifier?
The amount of water used by your humidifying device will generally depend on the type of product you are using. If you use a portable size humidifier for your room. You can have a capacity between 100 and 1000 ml. The bigger the tank. Longer will be the service time.
Therefore, you may have to put the amount of water according to the capacity of your tank and the output time. If you are using a whole house furnace humidifier. You can use between 5.5 liters and 45 liters per day.
The good thing is that the amount of water you put in your humidifier is enough to raise the humidity levels. But it doesn’t make a significant difference to your water bill.
Why does the water in my humidifier turn black?
The most common reason for water turning black is in a humidifier. It is the low-quality water that is used in it. This is generally the case with desktop humidifiers that use tap water in their reservoir tank.
As mentioned earlier, using tap water in a humidifier can leave colored mineral deposits in the humidifier tank as the water molecules evaporate.
These particles are the contaminants that are usually present in tap water or hard water that comes directly from your supply. The best solution to avoid these deposits in the humidifier water is to use demineralized water.
One more time. Distilled water is considered the best water for the humidifier. Since it does not contain any mineral by-products. As it is free of all kinds of minerals. It does not leave black deposits behind when it goes to the humidifier tank.
Keep these 10 yoga tips in mind before you start doing
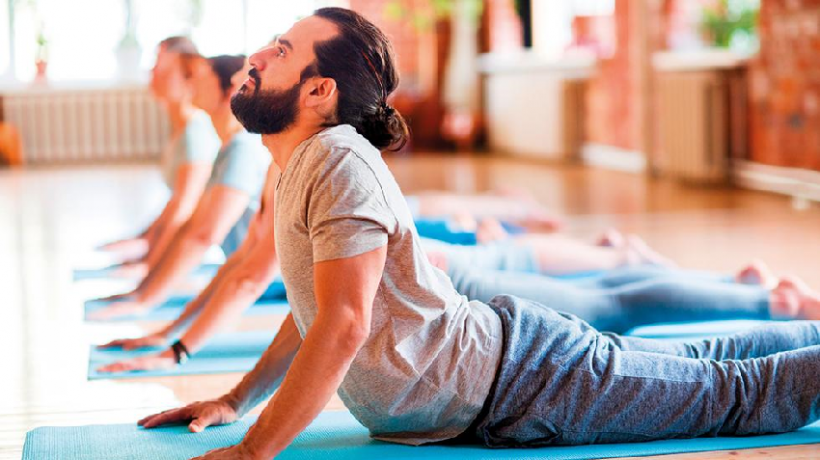
There are many people who have fallen into the nets of yoga, taking advantage of the multiple benefits, both for our body and for our mind, of this ancient discipline. Of course, before launching ourselves to practice yoga, we must take into account a series of aspects, to get the most out of it. This is confirmed by Cayetana Rodenas, a yoga teacher trained in Hatha, Ashtanga Yoga, and Yoga for children, who has not hesitated to compile what are, for her, the basic yoga tips and recommendations so that you can make the most of each of your yoga sessions. Performing this activity correctly without causing any physical and emotional problems.
Measure The Effortstart

Yes, it is not a matter of ending up exhausted session after session, as the expert explains. We seek well-being, not to end up exhausted. He even recommends following the scale from 1 to 10, where 1 is the easiest and 10 the most difficult and points out that each asana you perform does not have to reach a 10. Everything, of course, will depend on your body and your daily routine, you can get to 7, 8, or even less. You must listen to the signals that your body sends and follow the rhythm little by little.
Consider The Weather
The ambient temperature or the existing humidity also influences when practicing yoga tips. For this reason, the expert recommends not practicing yoga in adverse weather conditions, unless it is a specific yoga style where the temperature is extreme, very high, or very low, but keep in mind that, in that specific case, always It should be done under professional supervision and in good physical condition. It is essential if you want to avoid possible problems.
Breathing Is Essential
You have to be especially careful with breathing, as it is one of the basic pillars, and plays a fundamental role in the practice of yoga tips. The instructor details that what we must do is breathe normally (in a normal way respecting our rhythm, without holding our breath or hyperventilating excessively) unless special instructions are given.
Before Or After Eating?
As Cayetana Ródenas recommends, it is not a good idea to schedule your daily yoga session right after eating. You wouldn’t take advantage of it as much and, what’s more, it might not even come in handy. For this reason, he explains that you have to wait at least 2-3 hours for the food to settle and your stomach to be empty. Then yes, it will be time to place your mat on the floor and get down to work with the asanas.
For When You’re Tired
This is closely related to the first tip. And you don’t have to practice yoga when you’re exhausted. “Many people take the practice of yoga as something light, which is not true. Some yoga tips can make you sweat a lot, and even involve overexertion”, says the yoga expert. And it is that there are very demanding yoga asanas, which require effort and discipline to be performed. Therefore, it is better not to do yoga when you are especially tired.
In Expert Hands
Looking for a guide is essential. “This is not a rule but a guideline. It is much more advisable not to practice yoga alone. It is better to find a partner and practice under the supervision of an expert”, comments the expert. Who adds that the mere fact of reading, watching a video. And practicing can cause pulls or discomfort in the muscles, due to not practicing correctly. So if you’re doing an advanced pose for the first time, it’s best to ask someone for help.
Avoid Tight Clothes
You have to choose well the clothes with which you are going to do yoga. In fact, there are many fashion lines designed precisely for the practice of this discipline. As they fit perfectly and, above all, they are comfortable. And it is necessary to flee, above all, from excessively tight clothing. It is convenient that you leave aside the shoes and the clothes that are too fair while you practice yoga. The reason? Squeezing your upper back a bit can restrict movement of your rib cage and lung, which can lead to incomplete breathing.
A Shower Later
And once your session is over, you will undoubtedly feel like new if you take a shower. As recommended by the instructor, who points out that it is a good option to take a shower after a workout in which you may have sweated. Of course, she warns that you do not have to shower immediately. As soon as you finish, it is a better alternative to let the body dry normally before heading to the bathroom.
What If You Have The Rule?
In the case of menstruation, you also have to take some consideration into account before starting to do yoga, as the instructor details. Thus, she recommends not doing especially “feet up” postures (so-called inverted asanas) during menstruation. It’s much better to try simpler relaxation and breathing postures while you’re on your period.
And After Yoga?
You finish your yoga session and you wonder if it is a good idea to complement it with another type of sports practice, with a yoga post-training, to maximize results. The truth is that if you practice yoga, you know that once the session is over. Your body is left relaxed and with a feeling of well-being. Therefore, it is suggested not to do any high-intensity training sessions after yoga. The training should be done before the yoga class with good planning.
You may also be interested in SEVEN HEALTH TIPS TO IMPROVE YOUR QUALITY OF LIFE
What is an ultrasonic humidifier?
An ultrasonic humidifier is a device that uses ultrasonic vibrations to create water mist to improve the air quality of a room. It was invented by Hungarian engineer dezsö szabó, who had been experimenting with sound waves for many years before making his invention. Ultrasonic devices are not yet available on the market. However, their development continues and they are expected to become increasingly popular in the coming years. You can check out the dry eyes humidifier.
What is an ultrasonic humidifier?
An ultrasonic humidifier is essentially a display that creates dry air through strong vibrations. This machine has its own “Ultrasonic sound generator.” these machines generally feature two screens and one button: the first with an icon indicating how long you can use your device, other information about water treatment, and instructions for using it. You also need to read this user manual before starting up the device before proceeding further into daily usage from the interface.
Ultrasonics is the sound waves with a frequency between 19 kHz and 100,000 kHz (at 35°f [2.56°c]) and produce heat when moving towards the source of their oscillation through air molecules they encounter in their way while reaching frequencies lower than 20,000 Hz can create resonances that sustain themselves because of various heating effects from impacts on surfaces as well as indirect heating and other environmental factors.
To give you an idea, ultrasonic sound waves cannot be heard by humans but are produced through various vibration equipment for commercial purposes where the vibrations induced by these long-wave sounds (those with frequencies above 20 kHz) align themselves to transducers and create high-frequency noise when passing nonlinear materials like glass or plastic yielding large amounts of heat beyond ambient temperature as well as heating them versus lower frequency mechanical vibrations in accordance to maxwell’s equations for every point.
Features of ultrasonic humidifier
Ultrasonic humidifiers are sold in various qualities and models:
– Different sized water tanks – cleaning cartridges provide instructions for replacement or cleaning as well as filtering any obstructions. Ultrasonics can be used to induce sound waves of the desired frequency, thus creating sound through air molecules that resonate until they reach 40 kHz (which is the point at which they slow down significantly), generating heat while maintaining potentially harmfulness mechanical vibrations.
– Some models of ultrasonic humidifiers can make noises like a chime or alarm, such as the whistler ultrasonic humidifier that allows for human interaction and control when preset so you can customize the timer mist duration, adjust flow indication, turn it on/off with touch sensor controls along with many other options.
– Other models are remotely controlled or use independent timers to help regulate mist production by preventing the high overall amount of power consumption that can occur when the filaments heat up.
– Some models will not only cool your home and bedroom by adding a refreshing mist but also purify the air that is delivered inside of your house, eliminating the chances of people breathing in harmful toxins.
– No water necessary! Ultrasonic humidifiers are usually low-water users, which can save on plumbing costs since high pressure would require gallons to be used daily. In contrast, it may need no more than 2 liters for each day for carbonated evaporators or ultrasonic humidifiers.
– Energy-efficient in that they utilize anywhere from 30%~50% less energy compared to chemical heat and cold methods, which is good according to the EPA & U.S department of energy.
– Less hardware, no filters, and maintenance! Unlike other types, these machines do not require filters such as cotton, silver, or ionic to protect them. Additionally, they are not noisy (generally speaking), which is a major concern for homeowners that have plenty of family members who may like to sleep in the same room with it being awakened by its hums.
– No maintenance cost! There’s no visible water needed since these machines work on ultrasonic principles rather than chemical alternatives as depicted above and do not dissipate damage and work s for a long time.
How does an ultrasonic humidifier work?
Ultrasonic humidifiers utilize a very low frequency that can penetrate any object. Different types of filters are used depending on the unit. They provide various functions such as filtering dust, oils, and debris from water molecules to maintain cleanliness in your home, thus minimizing mold growth inside or out without having to replace them frequently.
A lower frequency carries sound waves all around it in the air creating a vibration. When this gets interrupted across another material, it will create a back and forth vibration pattern, which is beneficial for humidification. The thermal bubbles or disc of water or other types are produced by heat transference within the blower unit that throughout the air stream directly above it where they remain suspended over great lengths of time, continuing to move against resistance on its progress while pushing the humidity into your home.
Should you choose an ultrasonic humidifier for your home?
Suppose you’re looking for a quality humidifier that’s reliable, efficient, and has fewer maintenance needs as compared to its chemical counterparts. In that case, an ultrasonic unit is for sure something worth considering. Humidifiers work best when placed somewhere dry away from heat sources like direct sunlight and may not operate very well on low humidity levels; ultrasonic units can function at lower temperatures, making them more user-friendly since they don’t have to be mercilessly hot to function efficiently.
Additionally, ultrasonic units have traditionally been known for lasting much longer than their chemical counterparts. A good one will only be broken down after years of continuous usage, not weeks or months like traditional models sometimes can. The frequency utilized by most low-cost humidifiers doesn’t get the job done very well because it’s too weak, especially if you’re looking at individual rooms in your own home.
Conclusion
The ultrasonic humidifier is a very interesting and useful product. It is the most comfortable way to make your home environment more pleasant. It can humidify air without creating water droplets or fog, which are common problems with other devices. Ultrasonic humidifiers also have a wide range of features, such as an automatic timer, sleep mode, and so on. Some important things you should know about ultrasonic humidifiers are that they are small in size and don’t require electricity for operation. To know more please visit probaby.
Seven health tips to improve your quality of life

Rest, health, quality of life, fraternal hugs … These are aspects that are now valued more, because if 2020 taught us something. It was the importance of reaching a balance in our lives, especially with everything that has to be done. do with personal well-being.
According to Dr. Ximena Góngora, clinical psychologist and Mindfulness consultant, well-being goes far beyond sleeping and eating correctly, this concept refers to being well in the different dimensions that make up the human being.
Health tips for life
Well-being, key in these times
Do you feel like you don’t know how to handle difficult times that come your way or that at work you are no longer as productive? Psychological well-being is very important, as it helps the individual develop skills that allow them to cope with everyday situations such as solving difficulties in a more accurate way, controlling stress, managing uncertainty, among others.
When was the last time you enjoyed a leisurely shower or lived a day disconnected from work matters? Regarding World Wellness Day (Global Wellness Day), which this year focuses on the protection of mental health, we share 7 health tips to well-being that you can apply in your day today. Take note!
Stay in touch with nature

Whenever you can, take the opportunity to go for a walk, take a nap on the grass or just walk … Being in contact with nature has many benefits, including stimulating creativity, reducing stress, increasing concentration, and strengthening the immune system
Nutrition under control
When it comes to achieving physical and mental well-being, healthy eating is key. According to the specialist Ximena Góngora, it is advisable to consume foods that are rich in tryptophan, Which produces serotonin and allows you to be relaxed and have that feeling of well-being.
Get moving!
Walking with your dog, jogging, dancing… Whatever activity you like the most, try to dedicate a few minutes a day to it. Enjoy this moment without distraction and be mindful of what you are doing. Your body and mind will thank you!
Drink adequate water and take care of health
Do you drink enough water? Doing so has many benefits for your body, including increasing energy, protecting heart health, eliminating toxins and cleansing the kidneys, contributing to healthier and younger skin, among others. Not sure how to include this habit in your day today? Always have a bottle of water on hand, drink a glass half an hour before each meal, and set alarms so you don’t forget this healthy habit.
Build healthy relationships
Even in times of a pandemic, it is important to maintain spaces to reinforce healthy social relationships. For the psychologist Ximena Góngora, who is also part of the network of professionals of the DoctorAkí platform. This point is essential to achieve well-being. How to do it? Use digital tools to recreate new spaces for personal and family interaction such as games, contests, or virtual parties. If you prefer face-to-face meetings, remember the importance of responsibility and self-care.
A good deed
There is nothing that rejoices and fills the heart more than shaking hands with someone in need. Try to do good deeds and they do not necessarily have to be cheap, there are many more ways to do it such as listening, giving advice, sharing your knowledge …
Don’t forget your goals
Order a baby, get to know Europe, buy a car … Thinking and working towards the objectives and goals that are part of your life project will always be a breath of personal well-being and health.
You may also be interested in Protect children’s mental health on their return to school during COVID-19
Tips to get rid of a fall in mountain biking

Whatever sport you do, you will always run the risk of falling. The same thing happens in cycling, no matter what modality you practice. In this article, we will give you some basic tips to reduce the damage of a fall in mountain biking.
Correct the body position
You will avoid putting yourself at risk by taking the correct position while riding the bike up or down. You should try to ensure that the bicycle always has a perpendicular position to the terrain. Remember that it is extremely important to keep both feet/pedals in a horizontal position when descending. This will prevent them from hitting an obstacle in the ground, such as roots and stones.
Check and correct
Our brain registers everything we see while we are rolling. We can correct the bicycle position to avoid a more dangerous fall if we are about to fall or skid. Many times the best solution to correct our posture before a fall is to throw the body and force it in the opposite direction to the one we are about to fall.
If you cannot control the bike, the best option is to find a different exit or fall to reduce the damage. Do not follow the path’s route, since if you go on a slope, the safest thing is that you go straight ahead. It is better to try to find an exit towards the back of the bike or, in some cases, towards the sides of the bike (except when you have a gorge next to you).
Ride on standard place
If you can, try to ride on the standard place. This means that you should keep your weight in the center of the bike and maintain a correct balance between the front and rear wheels. In this way, you will be less likely to lose control when crossing obstacles or when braking. Remember that a correct balance is key to maintaining stability on the bike.
Control the speed
When you are riding downhill, it is very important to control the speed. The best way to do this is by using both brakes (front and rear). If you use only the front brake, you run the risk of skidding and losing control of the bike.
Use your body as a shock absorber
In case of a fall, it is very important to use your body as a shock absorber. When you hit the ground, try to relax and extend your arms and legs. This will help reduce the impact on your body.
Wear the right gear
Wearing the right gear can also help you get rid of a fall in mountain biking. When you wear the right gear, you will prevent or reduce injury to your arms and hands. In addition, it will help protect your knees, elbows, and legs from injuries.
Try to do some exercises for balance
In order to get rid of a fall in mountain biking, you should try to develop a good balance. You can do this by practicing some balance exercises. These exercises will help you keep your balance on the bike, even when you are crossing obstacles or riding in difficult terrain. The mongoose 26 mountain bike is a good option to get rid of a fall in mountain biking.
Learn how to fall correctly
In order to reduce the damage of a fall, it is also important that you know how to fall correctly. You should try to fall on your shoulder and not on your head. In addition, you should try to keep your hands and arms close to your body. This will help reduce the impact of the fall.
Be careful in wet or icy conditions
When the ground is wet or icy, it becomes much more difficult to control the bike. In these conditions, you are much more likely to fall. Remember that it is very important to be extra careful in these conditions and to take it easy when riding your bike.
Avoid distractions
When you are riding your bike, it is important to avoid distractions. This will help you focus on the task at hand and reduce the risk of falling. Distractions can include things such as music, talking on the phone, or eating. Try to avoid these distractions when you are riding your bike in order to reduce the risk of falling.
Let go of the bike
There are some people who will recommend you never let go of the bicycle handlebar since that way. You do not hurt yourself with the handlebar or lever. For us, this is not a good recommendation. If we watch videos of BMX, freestyle, or DH when they fall, the first thing they drop is the bicycle. We believe the same.
The importance of letting go of the bicycle in the event of a fall is that it has a defined trajectory, even in the event of a fall. For example, if you go down a slope and you feel like you’re going to blow your mind, you are more likely to eat dust if you don’t let go of the handlebars. But, if you let go of it in time and throw your body back, the bike will continue its course, and you will save yourself from a serious and dangerous fall.
Think fast and act to avoid a dangerous fall
When we realize that the fall is imminent, we must act. It is not advisable to do anything. We must try to save the fall or at least reduce the damage that we can do when we fall.
The first thing to avoid (although sometimes it is impossible) is to put your hands when falling. Landing with full force directly with your hands is dangerous. Try to land with your feet first. If you can’t and land with your hands, try to bend your elbows, stick your arms to the body and protect your head. As if you rolled into a ball.
Shrink and roll
If the fall is imminent when going down a slope after jumping a drop or ramp, curl your body and roll over your body.
Remember that you carry a force and inertia due to the speed of the bicycle, do not stop completely with your body. Instead, let the inertia flow either by walking or rolling on your body, so you can counteract the more severe blow.
Improve your flexibility
Something that you must exercise and improve is flexibility. For example, we must use our intelligence and flexibility to avoid falling or more severe blows when falling. It is imagining that one is a cat that will always try to land on its feet. This is a powerful defense and we will not even escape falling.
Develop body strength
Another way to avoid falling or reduce the effects of falling is to work on muscle strength. For example, if one has good back muscles, you can fall better and minimize the damage of high falls. The more resistance you have, the less likely it will be for the fall to be more serious.
Avoid falls in downhill
Let’s say that we cannot avoid falling in mountain biking, but we can avoid it and reduce its effects when having fallen. So we should avoid falling downhill because there is no way to stop and minimize injuries. If you go down a slope and feel like you’re going to blow your mind, you are more likely to eat dust if you don’t let go of the handlebars.
In conclusion,
There are some tips to try to avoid falling when you go riding your bike. First, we should always take it easy and be careful with ourselves and the environment. Second, we must always try not to let go of the handlebars as this will help us control our bicycle better and avoid a fall or serious injury. Finally, we should work on our flexibility and strength to help us when we fall. Remember, it is better to prevent a fall than try to fix the damages after!
How to Peg Wheelie Your BMX Bike Basic Guideline

Today I’m going to teach you how to do a peg wheelie in a simple way. Many riders want to know how they can do it. So, here we are going to give you some basic and advanced tips to make things easy.
Peg wheelie is literally the first back wheel trick. You’re going to learn. It is a pretty easy trick, or you just have to practice it and you’ll do your own in it and no time.
First Things to Follow
So, the first thing you’re going to want to figure out is which foot is your most dominant for a good way of doing that is to get someone to push you and whichever fault you put forward first, that’s your dominant foot.
At first, you need to look up the left foot and then check the right foot. There we go and firstly check left foot for the peg and right foot is for your balance.
So as with all flatland tricks, you want to learn how to walk into it and grow it first, then it’s important to find your balance point before you learn how to ride in or right out of the tree.
So, you just start off in a standard position and just push yourself off and you’re at fault.
Put down and keep doing it until you find that sweet spot. So, you’re going to want to start out rolling at a moderate speed. So, here if you engage with an adult BMX bike process is the same.
You can pump it and If you want to get more speed. The next step is to pull with your arms just a little bit. Don’t pull too much and shift most of your weight back.
So, it looks like this how’s it going? See your violence with your leg reason? Why is one of your legs just hanging? Is to help you balance any trait that all four of your limbs are on the bike.
Second Things to Follow
It’s going to be really hard to balance. So, it’s just easier with the one foot off. What do you want to use it? Pull up at first, don’t depend on your arms. Try to use your body weight to kick it off as a quick process.
Nothing do you want to use? It’s to help you get the bike off. You don’t want to depend on your arms to balance and there is also you need to save yourself from bike injuries.
You want to shift your weight back and then use your leg. The way I learned this trick is you literally done it everywhere I went. So, if you’re just cycling around town that you’re cycling to escape.
If you’re just cycling to school or work, or you may do try it on you are like, it’s really hard to hurt yourself from it. Most of that’ll happen. If you bail, is you land on your feet that’s all no damage done to you though.
Even kick that up so nicely, what can also happen is because, on your, one of your feet is on the bike. The bike can go a bit to the side, then you just let go of it and you’d be fine.
The bike might be a bit scratched. Well, you can always pay it now to ride out for a peg weenie is the easiest thing.
Third Things to Know
You just need to let your buyers down a step on the pedals and like the pathway. You can also be great because it can lead to a lot of different variations that can lead to a lot of different tricks, such as the long-span time machine learning how to do turbines as well, which you can check out the how-to Don on that trick right here.
I’m just going to show you a few variations that can deal with the peg wheelie. Peg wheelie skill is not so easy to acquire. You need regular practice to do it easily.
I’m going to get my friend, Jay who’s filming from you today to try the trick. See if I’m a good teaser.
Too big for this point and this is about six foot five and my bike is a flatland bike. So, it’s ridiculously small, as you can see, the size difference is quite big.
Now shift your weight back and pull a tiny bit with your arms and like that. So, you were going a bit to the site there.
So, what you want to do is bend one of your items. So, it kind of counters that bend your left arm and keep your right arm straight.
Now that was nice and so easy to do as you can see, it is a pretty easy trick. Are you getting used to it after maybe five or six drawers? There you go and that’s the show.
That was nice and see, usually, if you can’t do that trick, you have to practice for at least a couple of days to get as far as he got in a couple of tries and it’s all about fair play.
Conclusion
In this article, I try hard to give you a better explanation of BMX bike flatland tricks. I hope this article helps you and gets you started in flatland.
At least if you enjoyed this article please leave a like and comment and if you want to learn more biking info you can visit OutdoorXsports and it’s a biking blog. You may also like to read the bike size chart, to know which one is better for you.
Explore


Random Post
-

10 benefits of celery for the body
21 March, 2021 -

10 shortcuts to lose weight in a healthy and fast way
01 April, 2022 -

9 key tips to always staying in shape
23 October, 2021 -

Advantages and disadvantages of fast food
31 May, 2022 -

Are Apple Peels Hard to Digest?
28 July, 2023 -

Are Vegan Diets Healthy? Debunking Myths and Unveiling Benefits
17 August, 2023 -

Blog of 5 tips on how to care for the elderly
14 May, 2022 -

Buffalo hump: how to remove it and exercises
17 April, 2021 -

Can you sleep with tampons?
17 June, 2021